Submitting Matings in Helical
This article will cover an introduction to the Helical Matings module; Navigating to the matings module on the Helical database and finding the Helical specific mating forms; Submitting single Dam and; Sire matings and Submitting multi-Dam and/or multi-Sire matings.
Navigating to the matings module on the Helical database
- Navigate to the Helical database. A quick link can be found on the AWA website (www.wagyu.og.au) under the ”AWA database” drop down menu.

- If you are not already logged into Helical, you will need to log in. If you are unsure on how to login, or are not set-up as a user, please refer to the “Login Information” and “User and Policies information” for details instructions. If you are still having difficulty, please contact the AWA MSO team directly on (02) 8880 7700, or email [email protected].
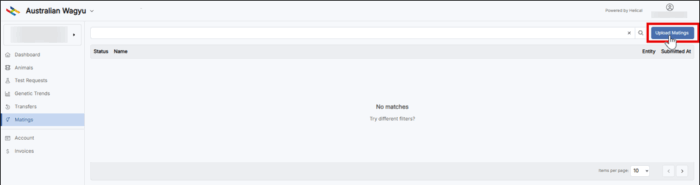
- Select the “Matings” tab on the side bar within Helical

- Select the “Upload Matings” button
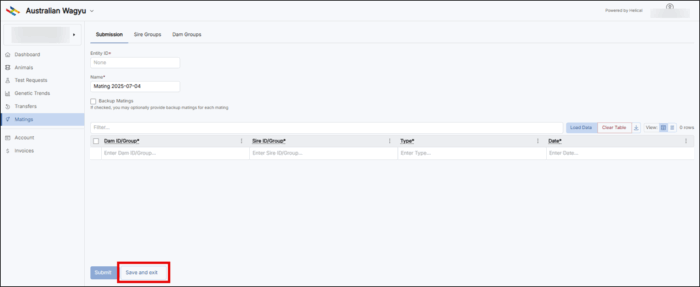
- Below is the page that will come up. From here you are able to enter matings, Sire Groups and Dam groups. NOTE: At any point in this process, you can select the “Save and Exit” button to Save your transfers and come back to finish them later. If you exit this screen without selecting this button, the data you have input will not be saved.
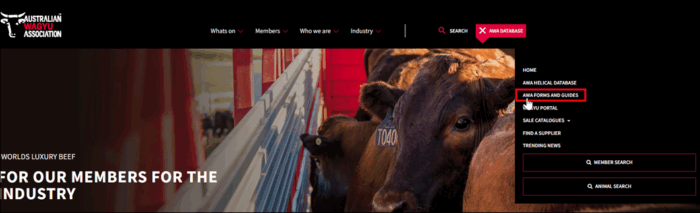
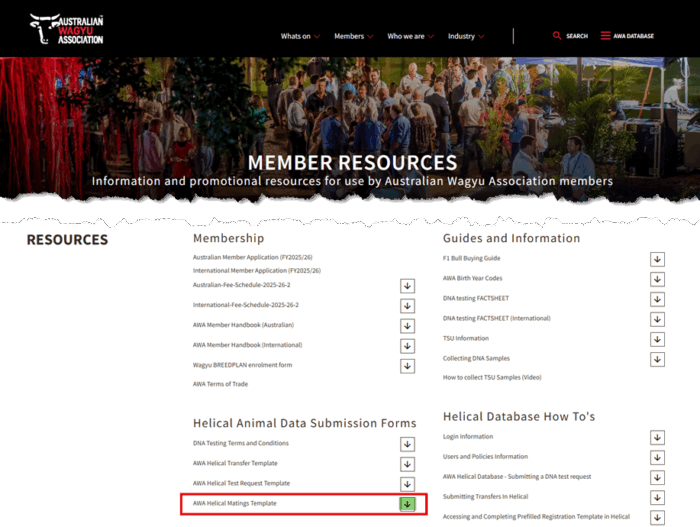
- Helical specific matings forms can also be found on the forms and guides page, or by navigating to the AWA Database button and then selecting “AWA Forms and Guides”.
- To download the Helical matings template, click on the arrow as highlighted green in the below screenshot.
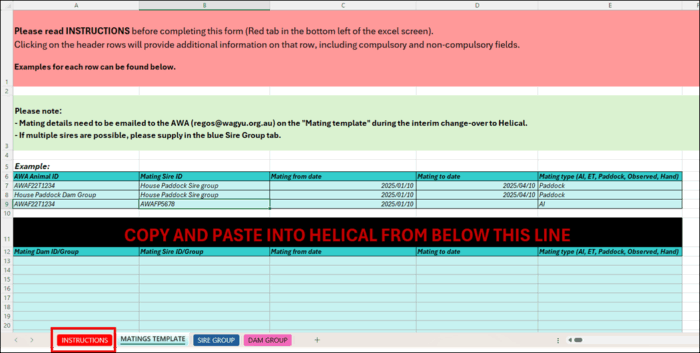
- When you open the matings template it will look as per below. Instructions on how to complete the transfer template can be found on the Red instructions tab at the bottom of the form.
Submitting single Dam and Single Sire matings
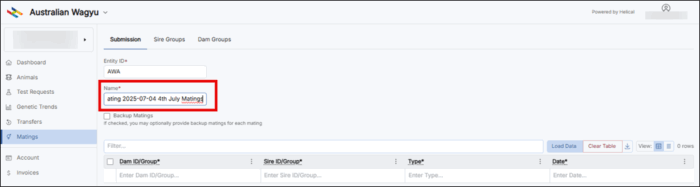
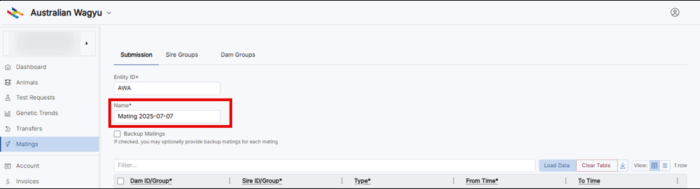
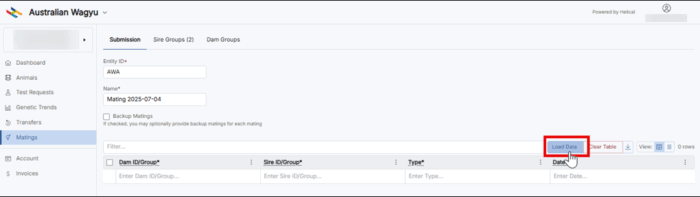
- Add in a Name in the “Name” field. Note: this will automatically populate with the import type and the date (IE: Mating 2025-07-04), however we would encourage you to add in a name that identifies this import for you so that it is easier for the MSO team to find if you need assistance, or if you need to review at a later date.
- Add your animals to have mating details recorded. The easiest way to do this is by the copy and paste method outlined in the below steps. Animals can also be added in individually by typing into the table. For Paddock matings, an extra column to allow you to record the “To Time” or Bull out date will automatically pop up.

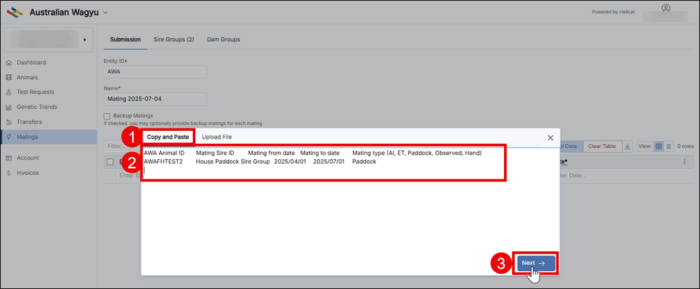
- Click the “Copy and Paste” tab option at the top of the pop-up box. This should be the default tab that the pop-up box opens to. Copy your list of animal IDs from where-ever you have them recorded (IE: Excel matings template) and paste into the box, then Click “Next”.

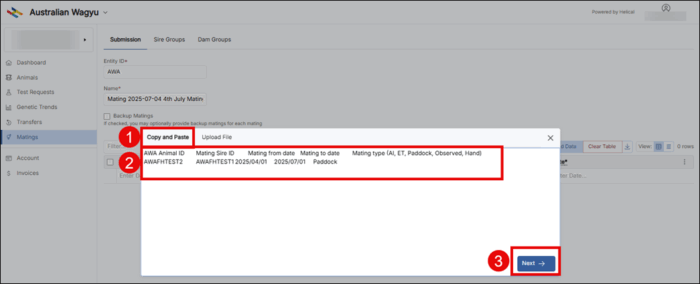
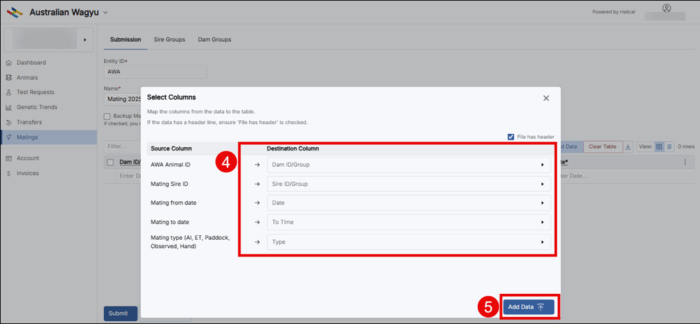
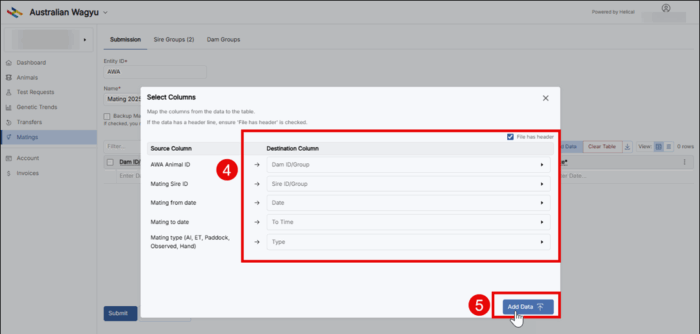
- Select the “Destination column” (IE: what information is in that column of data) from the available options – if using the AWA matings template, the columns should be assigned as per below. Once you have selected the “Destination Column” you will be able to click “Add Data”. This will populate the list of animals you have pasted in into the matings information table.
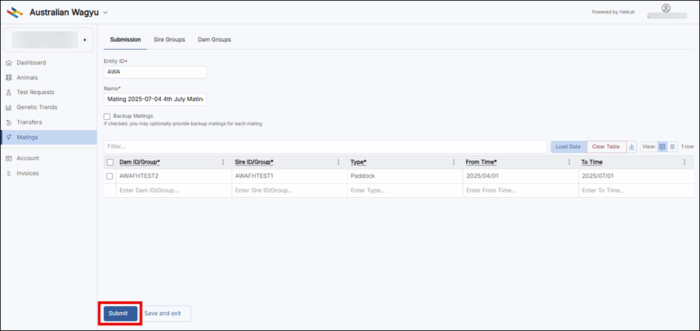
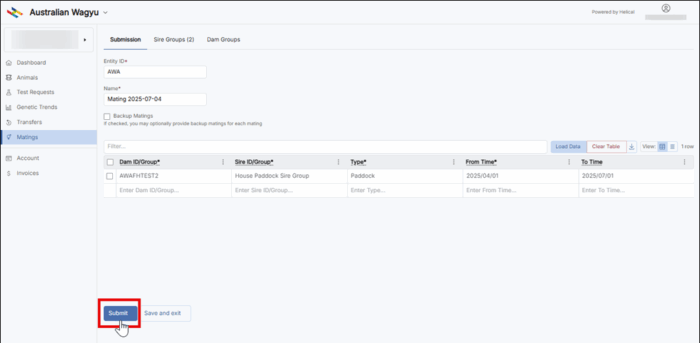
- Once you animals are loaded into the matings table and you are happy with the provided animals, click “Submit”.
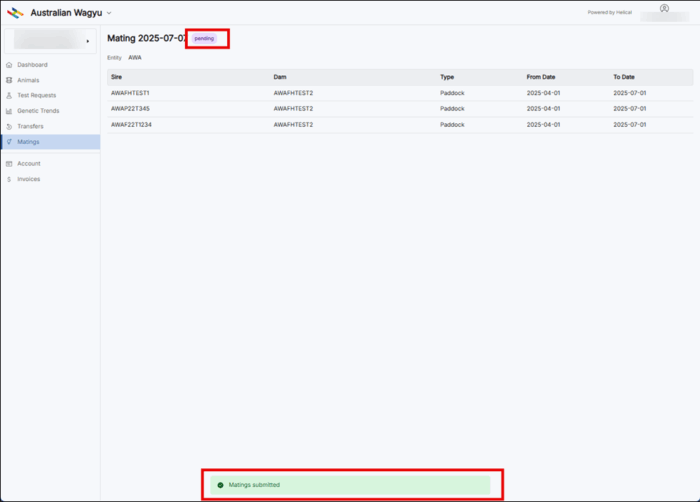
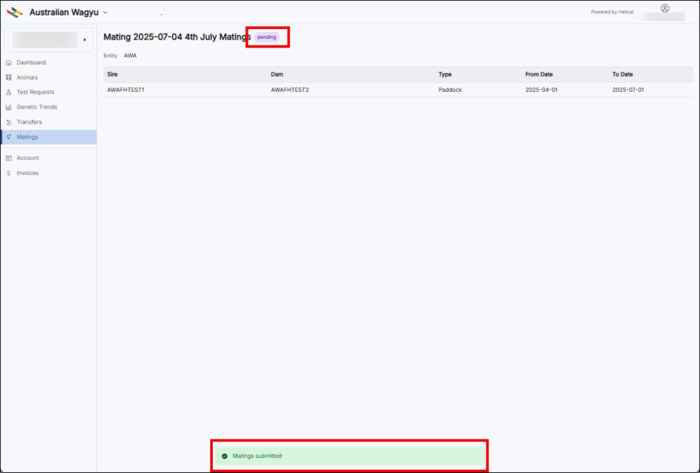
- Once you click transfer, you will get a “Matings submitted” message and the status or the mating submission will change to “pending”.
Submitting multi-Dam and/or Multi-Sire groups
- Add in a Name in the “Name” field. Note: this will automatically populate with the import type and the date (IE: Mating 2025-07-04), however we would encourage you to add in a name that identifies this import for you so that it is easier for the MSO team to find if you need assistance, or if you need to review at a later date.
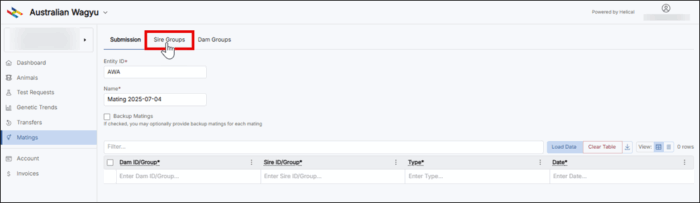
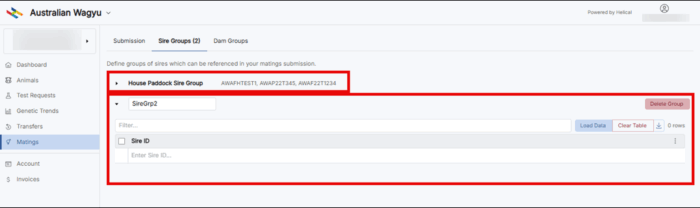
- To add in your Sire groups, select the “Sire Groups” tab, and then click on “Add Group”.

- Name your sire group and then add in the sires. These can be added in multiple ways as outlined below.
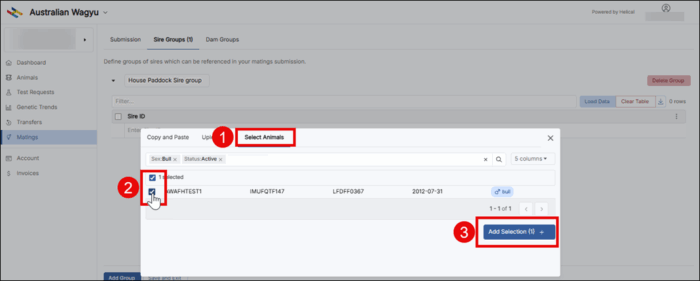
 a. Select animals from within your ownership.Click the “Select Animals” tab option at the top of the pop-up box.To narrow down your options of animals to select from, you can add in additional filters in the filter bar, or you can search for the animal by its registered ID.
Select the animals by clicking on the tick box next to the ID – you can select multiple animals within this screen, even if you clear or change the information in the filter bar. The number selected will display next to the tick box above the animal IDs.
Once you are happy with the selection, click “Add selection”. NOTE: You can remove animals after adding them to the mating table, or choose to add more as required even if you click “Add selection” here.
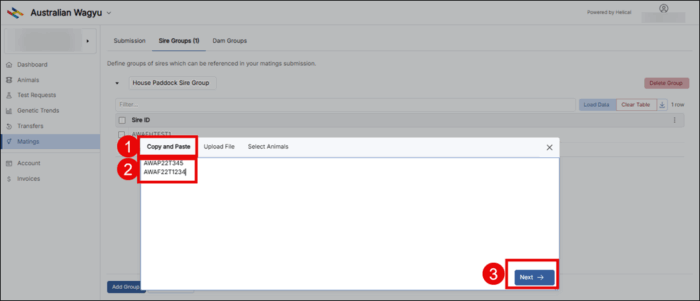
b. Copy and paste a listClick the “Copy and Paste” tab option at the top of the pop-up box. This should be the default tab that the pop-up box opens to.
Copy your list of animal IDs from where-ever you have them recorded (IE: Excel), and paste into the box. Click “Next”.
Select the “Destination column” (IE: what information is in that column of data) from the available options – for this particular data addition, the only option to select from will be “Sire ID”. Once you have selected the “Destination Column” you will be able to click “Add Data”. This will populate the list of animals you have pasted in into the sire group information table.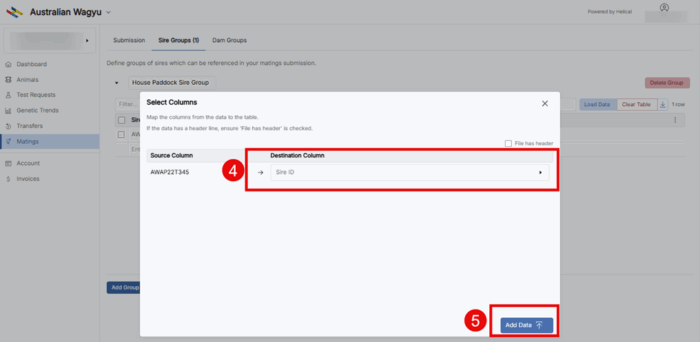
- Once you are happy with the sires added to your Sire Group, click “Add Group”.

- Once added, you can add in additional sire groups as required.
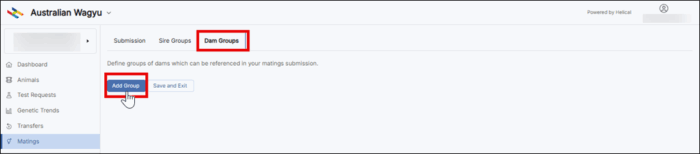
- If you have Dam groups to add in, this can be done via the same process as above but under the “Dam Groups” tab. This is particularly useful if you want to record the Dams and Sires within a paddock where mothering-up may be difficult or not recorded.
- Animals can also be added in individually by typing into the table. Add your animals to have mating details recorded. The easiest way to do this is by the copy and paste method outlined in the below steps. For Paddock matings, an extra column to allow you to record the “To Time” or Bull out date will automatically pop up.
- Click the “Copy and Paste” tab option at the top of the pop-up box. This should be the default tab that the pop-up box opens to. Copy your list of animal IDs from where-ever you have them recorded (IE: Excel matings template) and paste into the box, then Click “Next”.

- Select the “Destination column” (IE: what information is in that column of data) from the available options – if using the AWA matings template, the columns should be assigned as per below. Once you have selected the “Destination Column” you will be able to click “Add Data”. This will populate the list of animals you have pasted in into the matings information table.
- Once you animals are loaded into the matings table and you are happy with the provided animals, click “Submit”.
- Once you click transfer, you will get a “Matings submitted” message and the status or the mating submission will change to “pending”.