When extra samples are received by the lab, the lab will store (c-bank) these samples. Members can now submit a DNA test request for any animals that have a stored sample recorded. Follow the steps below to complete your submission to test a stored sample.
This factsheet will cover how to Submit a test request in Helical for a sample that is stored at the lab.
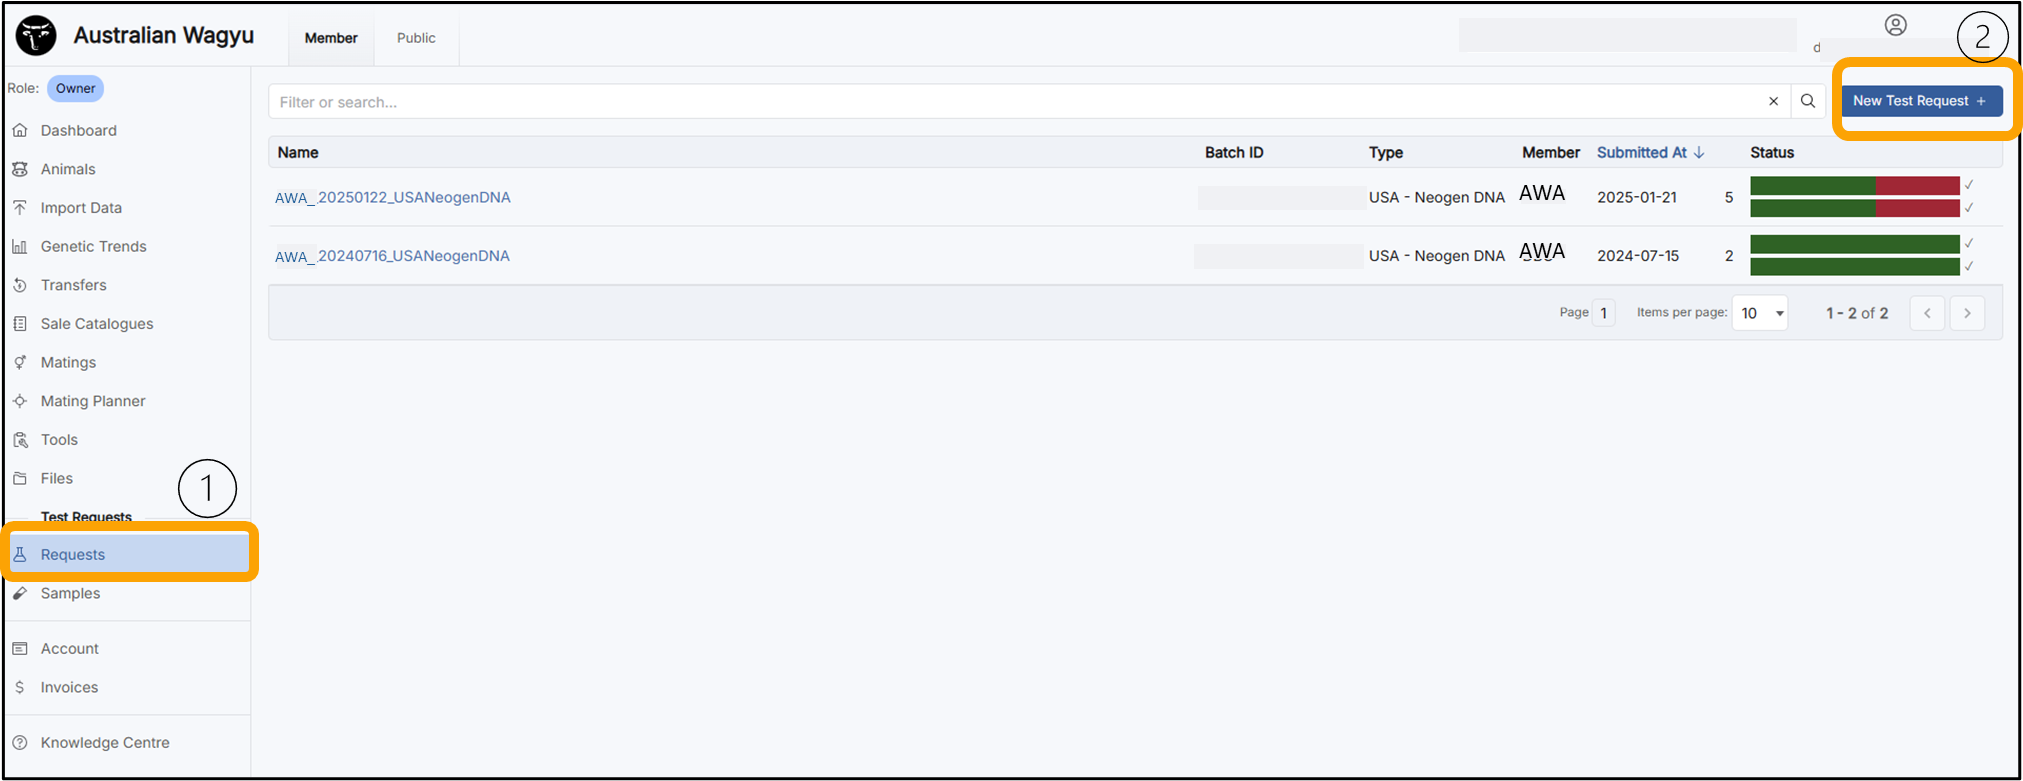
Starting a New Test Request Submission
Follow the standard process of creating a DNA test request in Helical. Please reference the “Submitting a DNA Test Request” guide in the “Forms and Guides” section of the AWA website if you need additional guidance on starting your test request.

*Please note that it is not necessary to fill out the “DNA test request template” form mentioned in the “Submitting a DNA Test Request” reference guide. This step can be skipped when submitting a request for a stored sample as information regarding the sample is already stored in Helical. As you will see further in this guide, any missing information required to successfully submit your test request (i.e. animal ID, potential parents, testing profile) will be filled in after you have selected your stored sample, outlined in the next section.
Selecting the Stored Sample for Testing
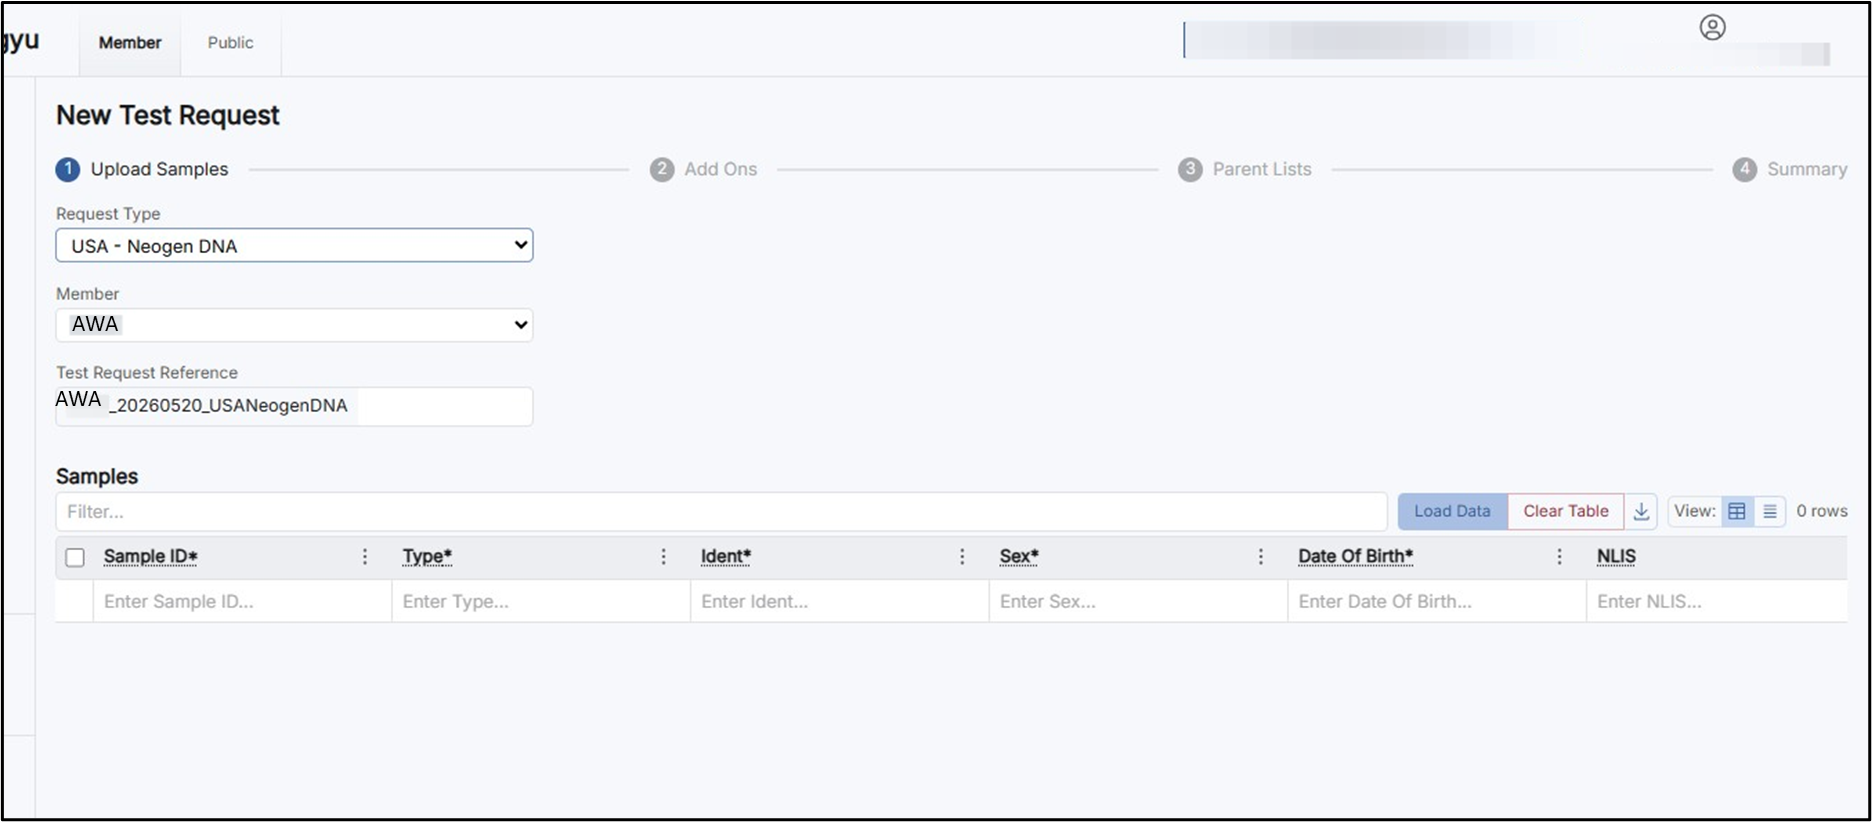
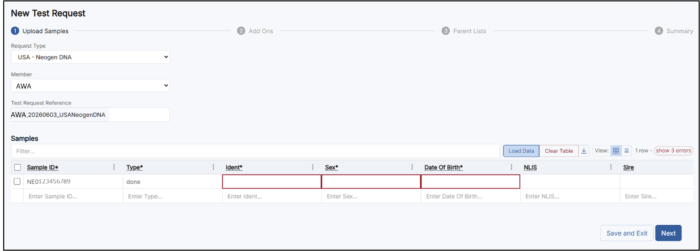
If following the guide above, you will navigate through step by step to step (selecting the “Load Data” button). If you have not used the guide, at this point you will have started your new test request, selected the “Request Type” (the lab through which you are testing), and are ready to fill in your sample information into the blank table as pictured below.
Select “Requests” from the menu on the left and then select the blue “New Test Request” button and fill out the necessary lab information.
Next you will click on the blue “Load Data” button.
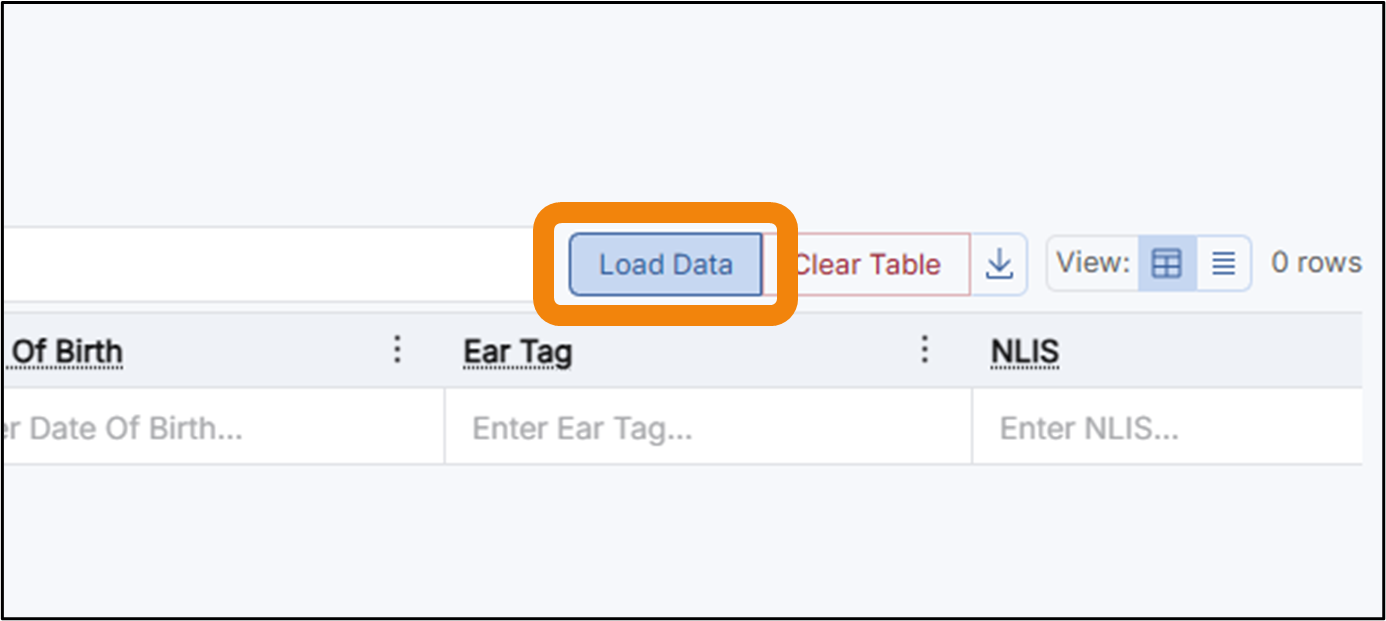
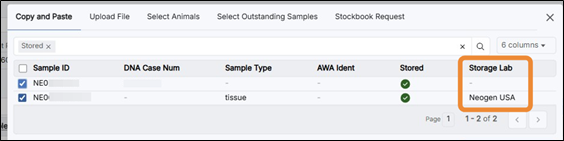
Once you have selected “Load Data” a new window will pop up. You will need to select the “Stored Samples” tab.
*Please note that it is also important to check that the lab you have selected to test through is the same lab that the sample is stored at. You can view what lab the sample is stored at in this window under the column header “Storage Lab” on the right-hand side.
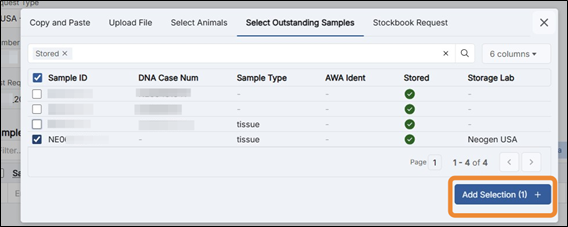
Select the checkboxes for the stored samples you wish to test, and then click the blue “Add Selection” button to add the stored sample to your test request.
Proceed with filling out the remaining sample information required for the test request submission as outlined in the “Submitting a DNA Test Request” guide. If not using the guide, you will continue by filling in any missing information outlined in red and hitting the blue “Next” button at the bottom of the screen.